Cómo hacer un chat con traductor, usando AWS Amplify.
Traducción de un interesante post de Takuya Kihara explicando cómo montar un sencillo programa de chat con función de traducción automática, usando Amazon AWS Amplify y «Predicciones», categoría «AI/ML», «Traducir Idioma».
 20 diciembre, 2021 Chat con traducción automática gratis
Texto original escrito por Takuya Kihara y publicado en dev.to
AWS Amplify tiene muchas funciones relacionadas con otros servicios de AWS. Este artículo utiliza «Predicciones», una categoría de «AI/ML», y de entre ellas, vamos a escoger «Traducir idioma».
https://docs.amplify.aws/lib/predictions/translate/q/platform/js
DISCLAIMER. Para traducir este artículo de Inglés a Español, se ha aplicado una técnica de traducción híbrida conocida como PEMT (Post Edited Machine Translation) dentro del marco del programa de MT de Ibidem Group traducciones Barcelona, una técnica aplicada hoy en días por algunas de las mejores agencias de traducción.
INDICE
1. Configurar los elementos necesarios
- Node.js (+ yarn)
- VueCLI (+Vuetify)
- Amplificar CLI
Instalar los elementos anteriores.
2. Crear un proyecto Vue
Primero creamos un proyecto Vue.
$ vue create sample-amplify-translator-chat

Vue CLI v4.5.13
? Please pick a preset: Manually select features
? Check the features needed for your project: Choose Vue version, Babel, Router, Vuex, Linter
? Choose a version of Vue.js that you want to start the project with 2.x
? Use history mode for router? (Requires proper server setup for index fallback in production) Yes
? Pick a linter / formatter config: Prettier
? Pick additional lint features: Lint on save
? Where do you prefer placing config for Babel, ESLint, etc.? In dedicated config files
? Save this as a preset for future projects? No

(snip)

$ cd sample-amplify-translator-chat
$ vue add vuetify

(snip)

? Choose a preset: Default (recommended)

(snip)

$
Luego configuramos el proyecto Amplify.
$ amplify init
Note: It is recommended to run this command from the root of your app directory
? Enter a name for the project sampleamplifytransla
The following configuration will be applied:

Project information
| Name: sampleamplifytransla
| Environment: dev
| Default editor: Visual Studio Code
| App type: javascript
| Javascript framework: vue
| Source Directory Path: src
| Distribution Directory Path: dist
| Build Command: npm run-script build
| Start Command: npm run-script serve

? Initialize the project with the above configuration? No
? Enter a name for the environment dev
? Choose your default editor: Visual Studio Code
? Choose the type of app that you're building javascript
Please tell us about your project
? What javascript framework are you using vue
? Source Directory Path:  src
? Distribution Directory Path: dist
? Build Command:  yarn build
? Start Command: yarn serve
Using default provider  awscloudformation
? Select the authentication method you want to use: AWS profile

For more information on AWS Profiles, see:
https://docs.aws.amazon.com/cli/latest/userguide/cli-configure-profiles.html

? Please choose the profile you want to use default
Adding backend environment dev to AWS Amplify Console app: XXXXXXXXXXXXXX
⠇ Initializing project in the cloud…

(snip)

Your project has been successfully initialized and connected to the cloud!
Some next steps:
"amplify status" will show you what you've added already and if it's locally configured or deployed
"amplify add " will allow you to add features like user login or a backend API
"amplify push" will build all your local backend resources and provision it in the cloud
"amplify console" to open the Amplify Console and view your project status
"amplify publish" will build all your local backend and frontend resources (if you have hosting category added) and provision it in the cloud

Pro tip:
Try "amplify add api" to create a backend API and then "amplify publish" to deploy everything

$
3. Añadir Auth
La función «Traducir idioma» necesita Auth.
Así que debes añadir la función Auth.
$ amplify add auth
Using service: Cognito, provided by: awscloudformation
The current configured provider is Amazon Cognito.
Do you want to use the default authentication and security configuration? Default configuration
Warning: you will not be able to edit these selections.
How do you want users to be able to sign in? Username
Do you want to configure advanced settings? No, I am done.
Successfully added auth resource sampleamplifytransla4290ed5c locally
Some next steps:
"amplify push" will build all your local backend resources and provision it in the cloud
"amplify publish" will build all your local backend and frontend resources (if you have hosting category added) and provision it in the cloud$
A partir de aqu´í, ya puedes subir los archivos.
$ amplify push✔ Successfully pulled backend environment dev from the cloud.Current Environment: dev| Category | Resource name | Operation | Provider plugin || -------- | ---------------------------- | --------- | ----------------- || Auth | sampleamplifytransla4290ed5c | Create | awscloudformation |? Are you sure you want to continue? Yes⠦ Updating resources in the cloud. This may take a few minutes...(snip)UPDATE_COMPLETE_CLEANUP_IN_PROGRESS amplify-sampleamplifytransla-dev-221649 AWS::CloudFormation::Stack Mon May 24 2021 22:42:33 GMT+0900 (日本標準時)UPDATE_COMPLETE amplify-sampleamplifytransla-dev-221649 AWS::CloudFormation::Stack Mon May 24 2021 22:42:34 GMT+0900 (日本標準時)✔ All resources are updated in the cloud$
4. Añadir predicciones
Ahora, la función principal.
Añade Predicciones para poder usar la función «Traducir idioma».
$ amplify add predictions
 ? Please select from one of the categories below Convert
 ? What would you like to convert? Translate text into a different language
 ? Provide a friendly name for your resource translateText20591e92
 ? What is the source language? English
 ? What is the target language? Japanese
 ? Who should have access? Auth and Guest users
 Auth configuration is required to allow unauthenticated users, but it is not configured properly.
 Successfully updated auth resource locally.
 Successfully added resource translateText20591e92 locally

Some next steps:
 "amplify push" builds all of your local backend resources and provisions them in the cloud
 "amplify publish" builds all of your local backend and front-end resources (if you added hosting category) and provisions them in the cloud

$
Sube los archivos
$ amplify push✔ Successfully pulled backend environment dev from the cloud.Current Environment: dev| Category | Resource name | Operation | Provider plugin || ----------- | ---------------------------- | --------- | ----------------- || Predictions | translateText39476081 | Create | awscloudformation || Auth | sampleamplifytransla0530875a | Update | awscloudformation |? Are you sure you want to continue? Yes⠋ Updating resources in the cloud. This may take a few minutes...(snip)UPDATE_COMPLETE authsampleamplifytransla4290ed5c AWS::CloudFormation::Stack Mon May 24 2021 22:51:01 GMT+0900 (日本標準時) UPDATE_COMPLETE amplify-sampleamplifytransla-dev-221649 AWS::CloudFormation::Stack Mon May 24 2021 22:51:01 GMT+0900 (日本標準時) ✔ All resources are updated in the cloud$
src/main.js debajo.
import Vue from 'vue'
import App from './App.vue'
import router from './router'
import store from './store'
import vuetify from './plugins/vuetify'

import '@aws-amplify/ui-vue'
import Amplify from 'aws-amplify'
import awsconfig from './aws-exports'

Amplify.configure(awsconfig)
import { AmazonAIPredictionsProvider } from '@aws-amplify/predictions'
Amplify.addPluggable(new AmazonAIPredictionsProvider())

Vue.config.productionTip = false

new Vue({
  router,
  store,
  vuetify,
  render: (h) => h(App),
}).$mount('#app')
Si te olvidas de escribir Amplify.addPluggable(new AmazonAIPredictionsProvider()) (como me pasó a mí), no funcionará.
Revisa este documento.
https://docs.amplify.aws/lib/predictions/getting-started/q/platform/js
5. Añadir API
Añade API(GraphQL) para guardar mensajes.
$ amplify add api
 ? Please select from one of the below mentioned services: GraphQL
 ? Provide API name: sampleamplifytransla
 ? Choose the default authorization type for the API API key
 ? Enter a description for the API key:
 ? After how many days from now the API key should expire (1-365): 7
 ? Do you want to configure advanced settings for the GraphQL API No, I am done.
 ? Do you have an annotated GraphQL schema? No
 ? Choose a schema template: Single object with fields (e.g., “Todo” with ID, name, description)

The following types do not have '@auth' enabled. Consider using @auth with @model
          - Todo
Learn more about @auth here: https://docs.amplify.aws/cli/graphql-transformer/auth

GraphQL schema compiled successfully.

Edit your schema at /[YOUR_DIRECTORY]/sample-amplify-translator-chat/amplify/backend/api/sampleamplifytransla/schema.graphql or place .graphql files in a directory at /[YOUR_DIRECTORY]/sample-amplify-translator-chat/amplify/backend/api/sampleamplifytransla/schema
 ? Do you want to edit the schema now? No
 Successfully added resource sampleamplifytransla locally

Some next steps:
 "amplify push" will build all your local backend resources and provision it in the cloud
 "amplify publish" will build all your local backend and frontend resources (if you have hosting category added) and provision it in the cloud

 $
Cambia amplify/backend/api/sampleamplifytransla/schema.graphql a continuación.
type Message @model {
   id: ID!
   userName: String!
   originalMessage: String!
   translatedMessage: String!
   createdAt: AWSDateTime
 }
Sube el proyecto.
$ amplify push✔ Successfully pulled backend environment dev from the cloud.Current Environment: dev| Category | Resource name | Operation | Provider plugin || ----------- | ---------------------------- | --------- | ----------------- || Api | sampleamplifytransla | Create | awscloudformation || Auth | sampleamplifytransla4290ed5c | No Change | awscloudformation || Predictions | translateText20591e92 | No Change | awscloudformation |? Are you sure you want to continue? YesThe following types do not have '@auth' enabled. Consider using @auth with @model- MessageLearn more about @auth here: https://docs.amplify.aws/cli/graphql-transformer/authGraphQL schema compiled successfully.Edit your schema at /[YOUR_DIRECTORY]/sample-amplify-translator-chat/amplify/backend/api/sampleamplifytransla/schema.graphql or place .graphql files in a directory at /[YOUR_DIRECTORY]/sample-amplify-translator-chat/amplify/backend/api/sampleamplifytransla/schema ? Do you want to generate code for your newly created GraphQL API Yes ? Choose the code generation language target javascript ? Enter the file name pattern of graphql queries, mutations and subscriptions src/graphql/**/*.js ? Do you want to generate/update all possible GraphQL operations - queries, mutations and subscriptions Yes ? Enter maximum statement depth [increase from default if your schema is deeply nested] 2 ⠇ Updating resources in the cloud. This may take a few minutes...(snip)✔ Generated GraphQL operations successfully and saved at src/graphql✔ All resources are updated in the cloudGraphQL endpoint: https://XXXXXXXXXXXXXXXXXXXXXXXXXX.appsync-api.ap-northeast-1.amazonaws.com/graphqlGraphQL API KEY: XXX-XXXXXXXXXXXXXXXXXXXXXXXXXX$
6. Implementación
Ya podemos implementar el chat para incluir la función de traducción.
Si quieres conocer el detalle del código, consulta este repositorio.
tacck / sample-amplify-translator-chat
src/views/Chat.vue
src/components/Timeline.vue
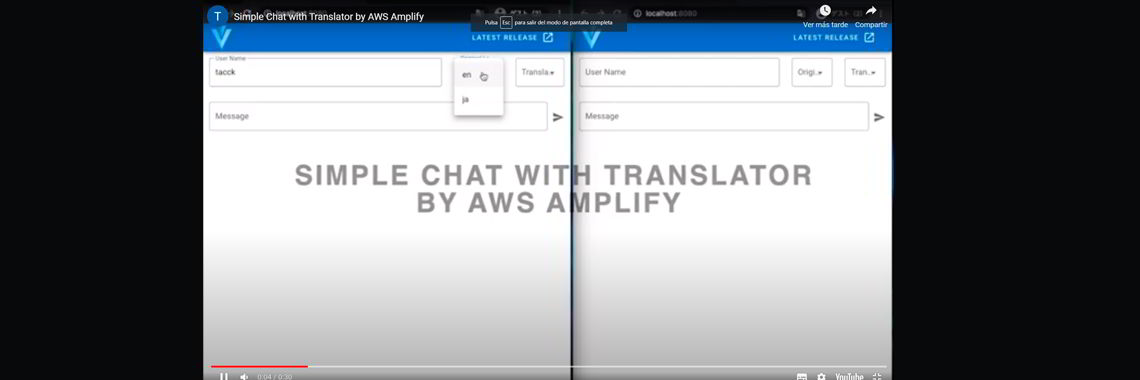
7. Control
Puedes ver el chat en el siguiente vídeo
AWS Amplify es una de las formas más sencillas de utilizar Amazon Translate.
Articulos relacionados
Traducción de un interesantísimo artículo de Yiğit Findikli, donde nos explica detalladamente como podemos utilizar y sacar provecho de la API de internacionalización PrimeNG con ngx-translate.
Traducción de un interesante post de Takuya Kihara explicando cómo montar un sencillo programa de chat con función de traducción automática, usando Amazon AWS Amplify y "Predicciones", categoría "AI/ML", "Traducir Idioma".
Traducción de un interesante post de Takuya Kihara explicando cómo montar un sencillo programa de chat con función de traducción automática, usando Amazon AWS Amplify y "Predicciones", categoría "AI/ML", "Traducir Idioma".